Have you ever wondered how some photographers manage to capture beautifully lit trees against a perfect, saturated sky, with an endless array of stars in a single shot, in the middle of nowhere, miles away from technology?
It may surprise you to learn that this is a simple technique. Light painting, which is literally the art of painting with light, can be achieved using any SLR camera and any artificial light source. A torch works best, and a tripod or steady surface is essential.
How is the sky so vivid?
The colours will become more saturated when a higher ISO is used. For the best effect, shoot your image during the last few minutes of dusk when the sun is gone and the sky a rich, deep blue or a lingering red. You will need a long exposure to allow the light to slowly build up in your image.
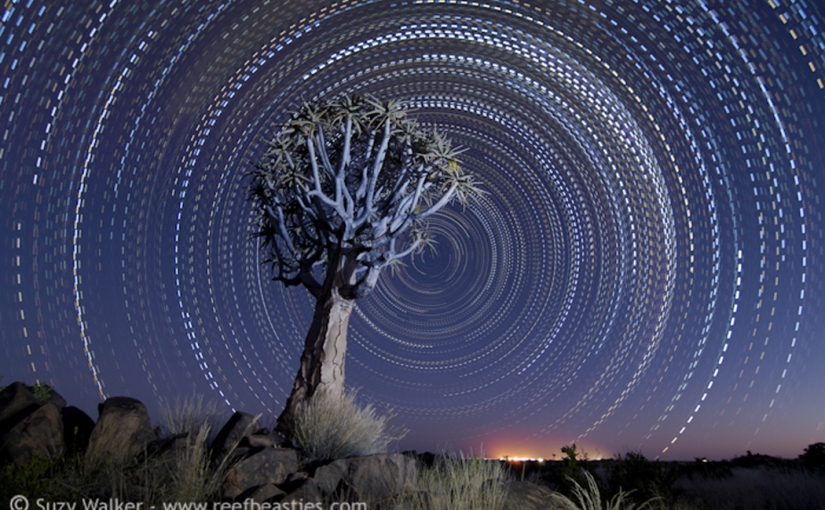
How do I achieve the starry, starry night effect?
Star trails are captured when the camera is still with the shutter open for long enough for the earths’ natural rotation to affect the position of the stars. This needs a minimum of 30 minutes. Some images use exposures in the realms of hours.
Because the stars are not very bright, and the ambient light is dark, it is very difficult to over expose your shot. In images like these the effect of a longer shutter speed is simply a longer trail of stars.
How do I make the trees shine?
This is the fun part. With the camera set up for a long exposure (30 seconds or more) you can highlight areas of interest by gently shining a torch over an object. Using a gentle, even motion will create a soft, hand painted look, whilst flashing a detachable camera flash or speed light will create a harder, more uniform look. The possibilities are endless.
Try to play around with moving in and out of the frame for a ghostly or multi-character effect, or experiment with coloured lighting and light sources of different sizes and strengths. The darker the ambient light the longer the exposure and the more time you will have to add a creative touch.
Bringing it all together
Light painting works best when you tie all of the techniques together in an interesting and unexpected way.
1- Set your camera to f22, ISO 400, and put it on a tripod or steady surface. If you are using a steady surface, it is also a good idea to switch on the
self-timer to limit any movement caused when you press the button to take your shot. The shutter speed should be set to B for bulb so that it is able to stay open indefinitely.
2- Compose your frame to include a good area of the sunset, a relatively large amount of sky, and an object of interest, such as a tree.
3- When the sunset is nearly over and the light is lingering into twilight, open the shutter and leave it open. If you have a remote control this can be locked into the open position, if not, you will need to be a bit creative about finding a way to keep the button pressed. Prestik works well.
4- Once it is dark, use a torch to gently light the foreground object for approximately 20-40 seconds, depending on how bright the torch is and how much you want to light up the object. This is the arty step. Shining the light from the side will enhance the textures.
5- Leave the shutter open for a further 30 min to a few hours and enjoy the braai whilst the stars make trails in the sky.
Light painting is a rewarding and easy technique. There are very few rules and very little that can go wrong. The more fun you have with it, the better!

Amazing! Wow!
LikeLike